<?php
/**
 * Module implementing Drupal's hook_nodeapi
 * @see http://api.drupal.org/api/function/hook_nodeapi/6
 * Important Note: This is sample code.  You'll need to modify this code to just use the inline tags on your choice of content types
 * and to check if the user has permission to use inline tags
 */
function inlinetags_nodeapi(&$node, $op, $a3 = NULL, $a4 = NULL) {
  switch ($op) {
    case 'submit':
      break;
      //before stuff makes it into the database (before update or insert)
    case 'presave':
      //parse out any inline tags within body
      $bd = _parseinlinetags( $node->body );
      //parse out any inline tags that may have made it into the teaser
      $ts = _parseinlinetags( $node->teaser );
      //replace the body with a version that has removed the inline tags code
      $node->body = $bd[0];
      //replace the teaser with a version that has removed the inline tags code
      $node->teaser = $ts[0];
      //if there were any preexisting tags then add them to the tag string
      if ($bd[1] !=''){
        //note my tags vocabulary id is just hard coded here
        $vid = 1;
        $tagstring = $bd[1];
        //if there were pre-existing tags, add them to the tag string
        if ($node->taxonomy['tags'][1]!='') {
          //prepend the new tags to any old ones
          $tagstring .= ','.$node->taxonomy['tags'][1];
        }
        //now add them to the tags vocab for the insert or update operation
        $node->taxonomy['tags'] = array($vid => $tagstring);
      }
      break;
    case 'insert':
    case 'update':
      break;
    case 'view':
      break;
  }
}
/**
 * A private function to parse out placeholder tags
 * This version has been stripped to parse out just placeholders with a format like:
 *
 *
 * @param string $page_contents
 * @return array an array with $return[0] the tags parsed out and $return[1] as a string with the tags
 */
function _parseinlinetags( $page_contents )
{
  $matches = explode( '' ) );
    $pageplaceholder = str_replace( '[/tags]', '', $placeholder );
  }
  $search = '';
  $page_contents = str_replace ( $search, '', $page_contents );

  $return[] = $page_contents;
  $return[] = $pageplaceholder;
  return $return;
}
?>
An external blogging application like Windows Live Writer will allow you to create and publish posts from your desktop to your Drupal site. But, before you can post via one of these applications you’ll need to enable and configure your Blog API module
and a few additional settings.
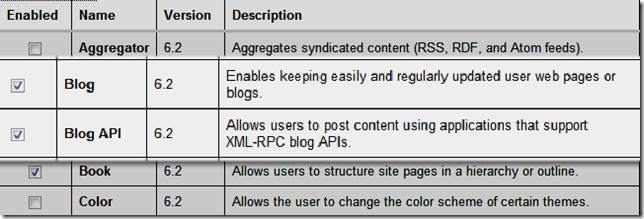
Step 1: Enable the Modules
Enable your Blog and Blog API modules here: admin/build/modules
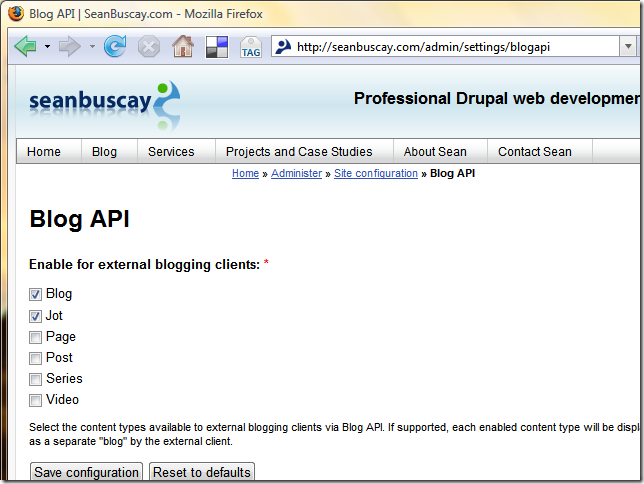
Step 2: Make Content Types Available to External Clients
Select the content types you’d like to make available to external blogging clients: admin/settings/blogapi
I recently reviewed a number of client cases from over the past years. I’m reminded that I have been privileged to work with some great clients; doing great work together. I’ve selected a sample of cases to share with you because of the successful results the work produced for the client.
Make sure you have already selected the Weblog account for your Drupal site and for your desired content type. In Windows Live Writer, each content type which Drupal makes available through the Blog API appears as a different Weblog account.
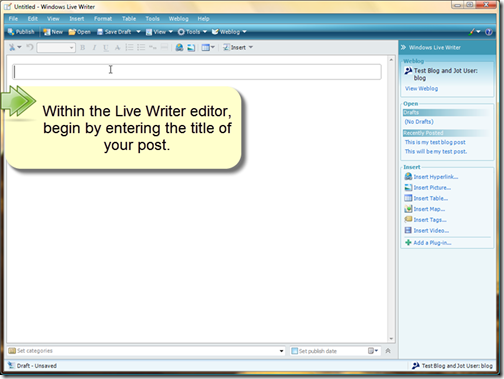
Within the Live Writer editor, begin by entering the title of your post in the section labeled, “Enter Post Title Here”.
Then use the rest of the text area to enter your body text.
To add a picture to your post click, “Insert Picture” on the Windows Live Writer sidebar at the right side of the application.
You have the option to select an image from your computer or insert a picture from the web.
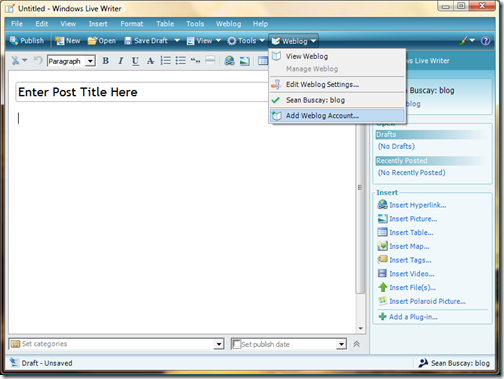
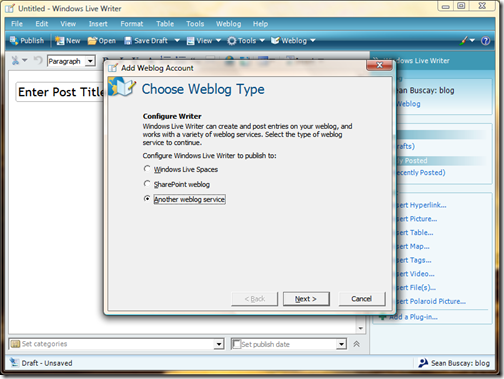
Let’s begin by adding a new Weblog account from within Windows Live Writer.
From the Weblog button or Weblog menu, choose “add Weblog account”.
Choose Weblog Type
Next, select the option labeled, “Another Weblog service”.
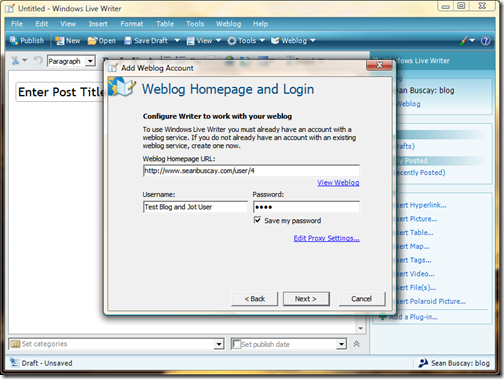
Weblog Homepage and Login
In the “Add Weblog Account” dialogue box, enter the user”s Weblog Homepage URL, Username, and Password. For the Weblog Homepage URL, enter the user”s Drupal account URL. For example, http://yourblogurl.com/user/<userid> (replace <userid> with the user”s id number).
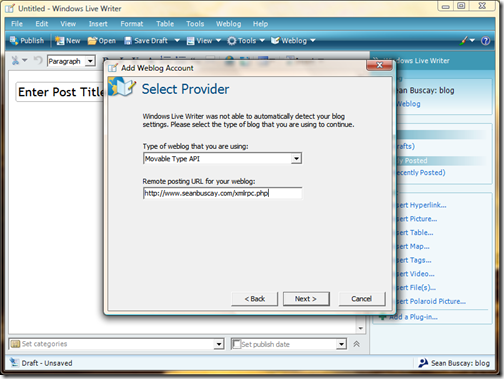
Select Provider (Blog API)
Next, Windows Live Writer will try to detect your Weblog settings.
Most likely Windows Live Writer will not automatically detect your Drupal blog settings. Live Writer will then ask you to select a provider, which is simply what Blog API you would like to use. I”ve tested several Blog APIs with Drupal. The Movable Type API seems to work well for my client”s needs. We”ll select this option from the drop down menu.
Now, you will be asked to enter the “Remote posting URL for your Weblog”. This is the URL to your Drupal installation’s XML-RPC file. It is usually located in Drupal”s main install directory at: http://yourblogurl.com/xmlrpc.php.